I’m not sure if there is a better place to put this but I’d love to see a few changes.
-Adjustable Layer Order
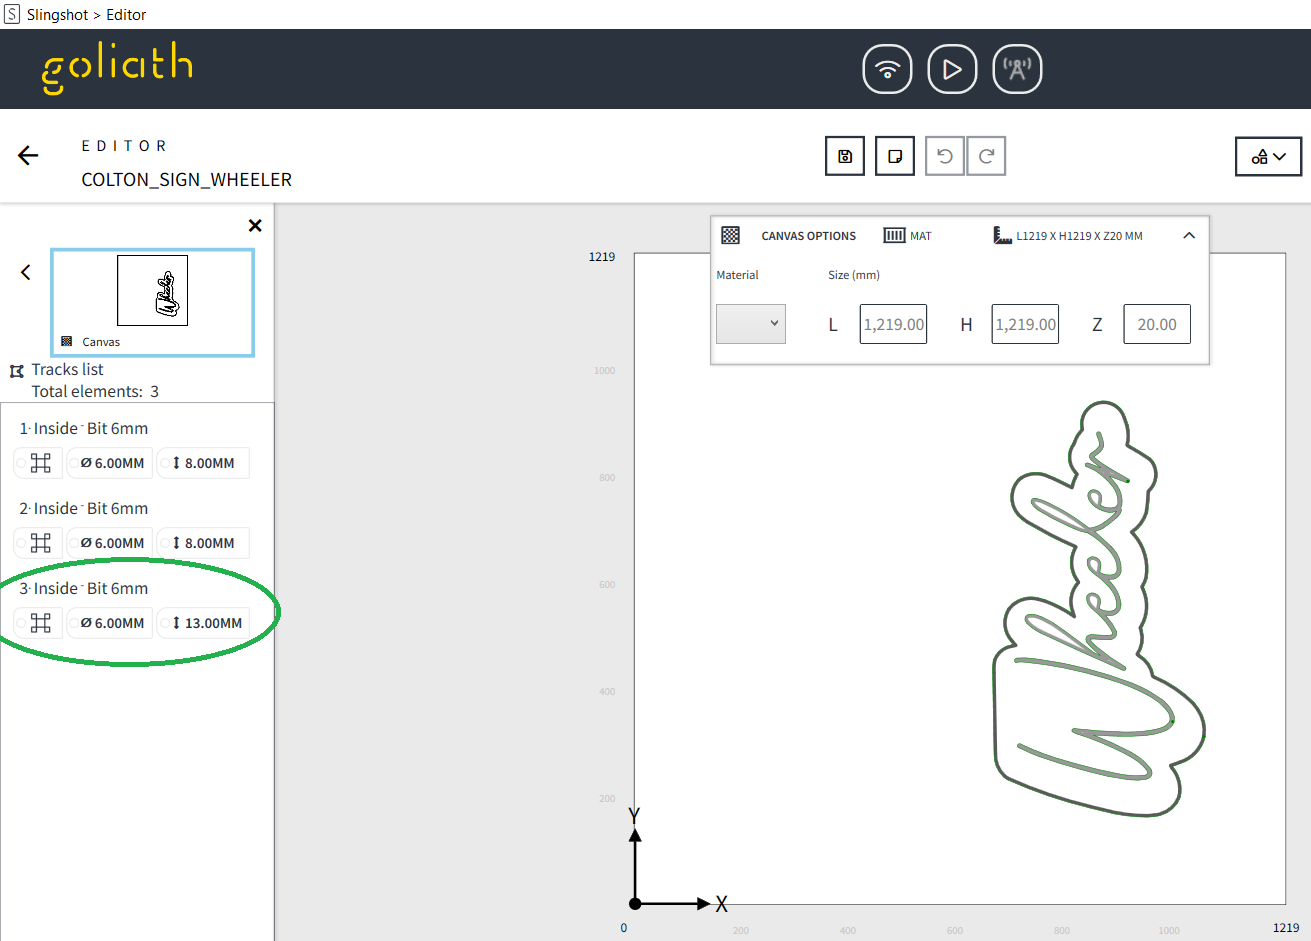
Once the SVG has been imported it is impossible to move them around. The only way to do it I’ve figured out is to duplicate the track and then delete the older ones. A bit cumbersome but it would be nicer to simply drag them around.
-Layer Names and Colors
Especially with complicated cuts to prevent accidentally cutting something in the wrong order it would be nice to add a memo on each cut layer so you can keep them in order. A color would be cool too.
Its also impossible to back up once you generate the Gcode. It would be cool if you could without exiting the file.
Hi @Grant I did not understand regarding moving svg on the canvas- I do it all the time (my projects are small though). The tracks can be moved when selected either by arrow head or from the track list on the left side.
If the tracks are grouped then it will be different to separate them- you need to do this in inkscape path and break apart.
Slingshot is not a CAD but only a CAM- though it has few features as making circles polygons and lines.
Making different colour tracks again is a CAD feature- they might come with it in future I guess.
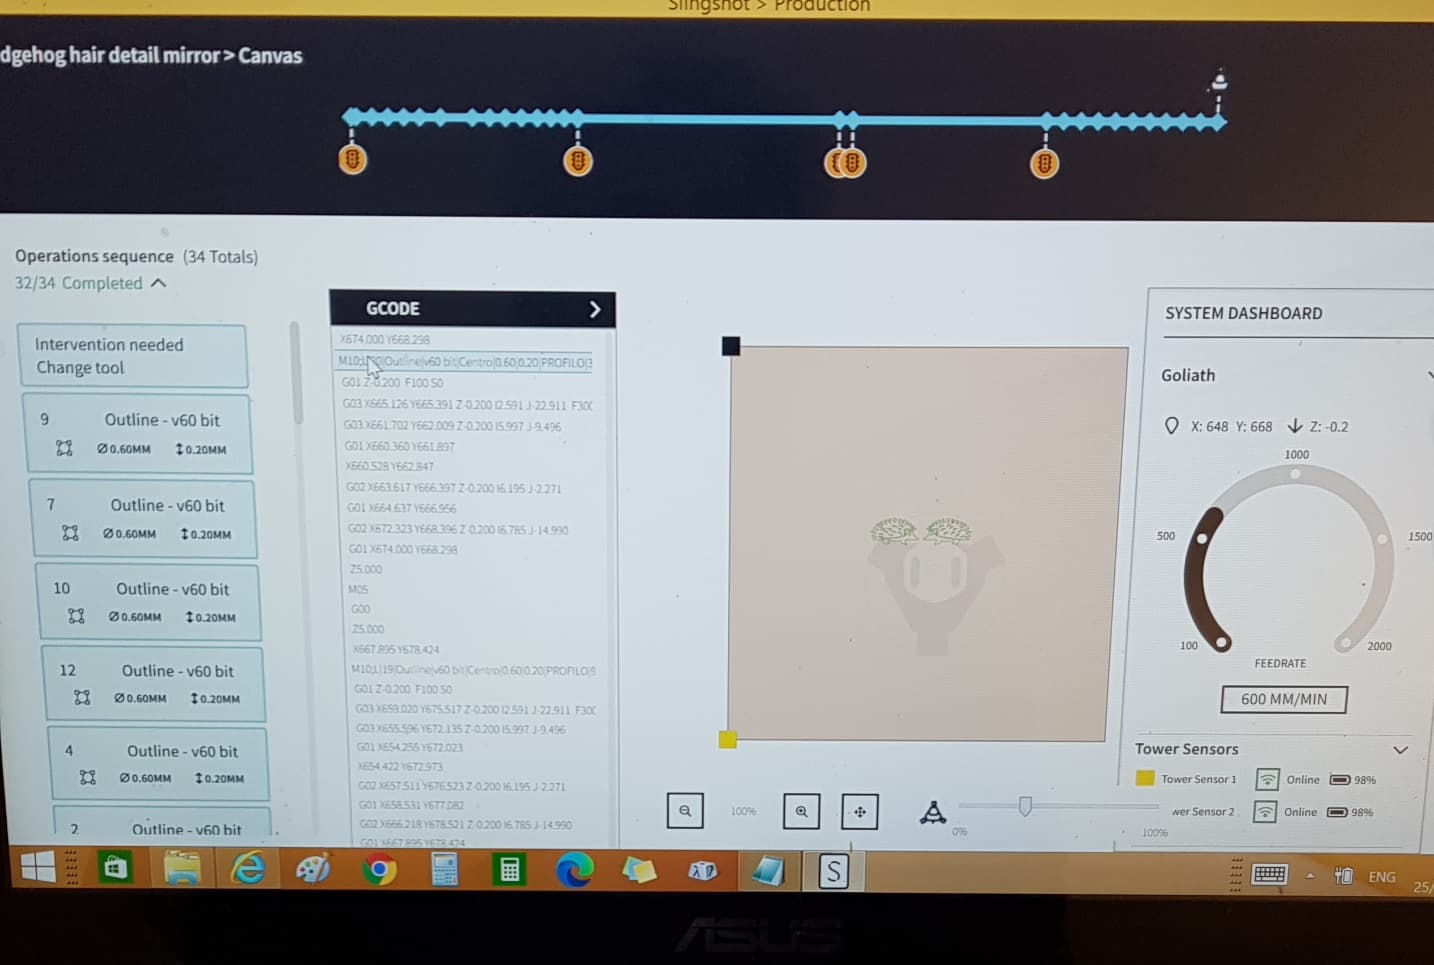
The Gcode is in the c:/slingshot/projects/gcode (it is a text file and can be read by other gcode readers from google)
The Gcode is saved as you can see but I think it is a safety feature not run from previous gcode if you have changed stuff like move the object or material/bit- hence it rewrites every time you reset and restart.
These are my observations learning from mistakes .
Good luck - keep experimenting before you spoil expensive material- I use mdf as it is easily cut.
Hiya! I mean say if you import an SVG and it turns into 3 layers you can’t alter the order they are cut in. Like you can’t rearrange them if it is cutting something in an order you don’t want. I had a project that had 3 cut lines and one that was meant to cut much deeper and cut out the entire project but it got somehow out of order. The only way to change it, unless I’m a bonehead, is to duplicate the track and delete an old one to alter the order.
Okay! Got it. This feature is promised to come in the new year - I hope so.
I do the same way you do.
Awesome neon sign👌.
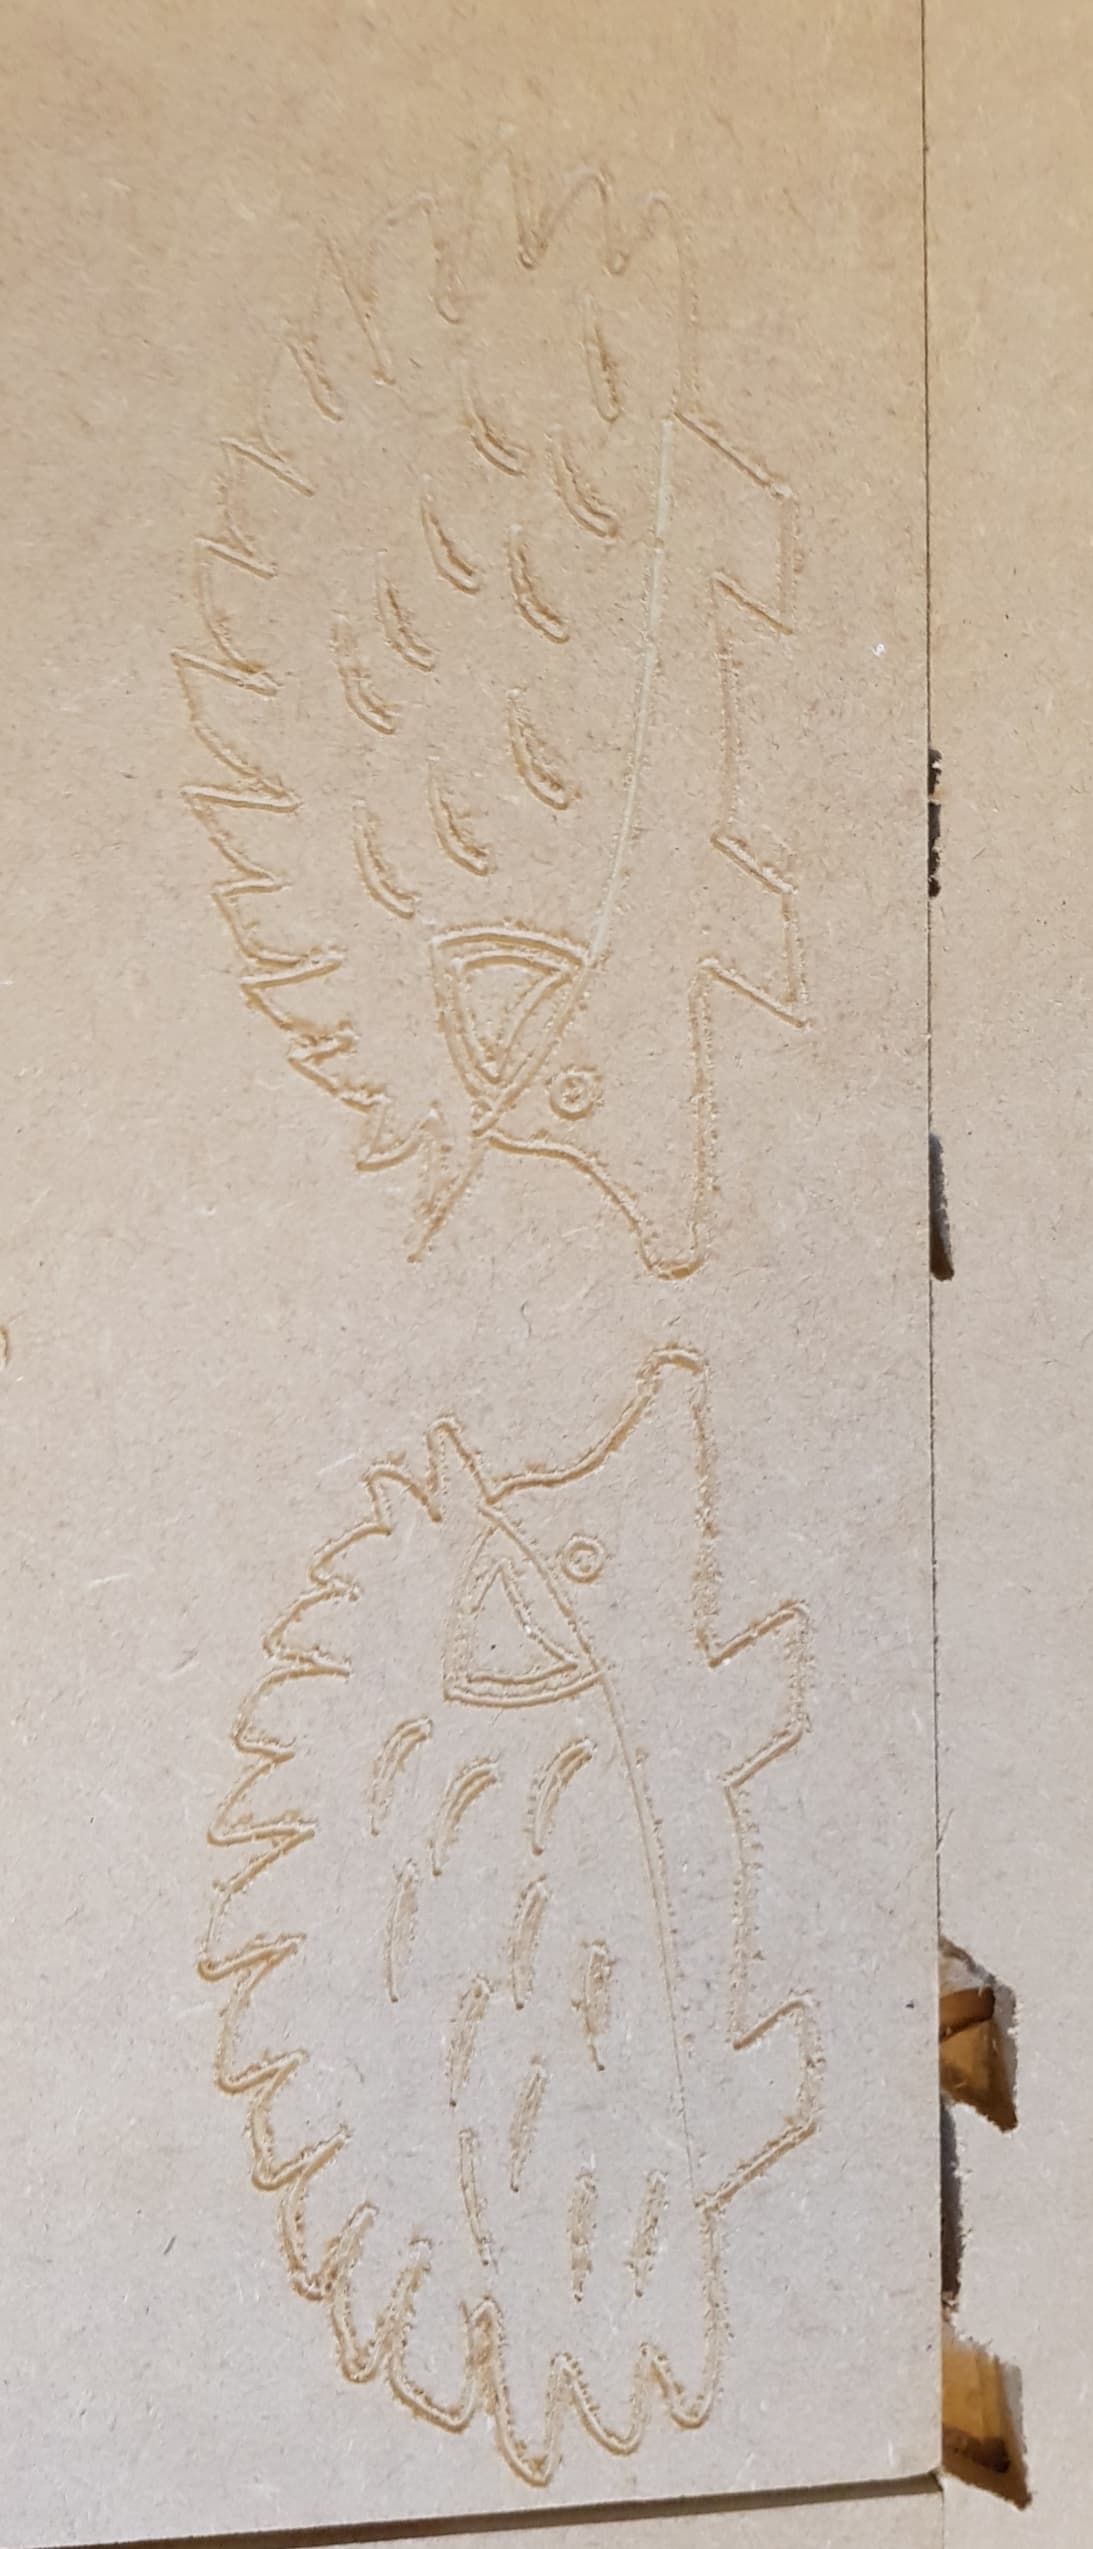
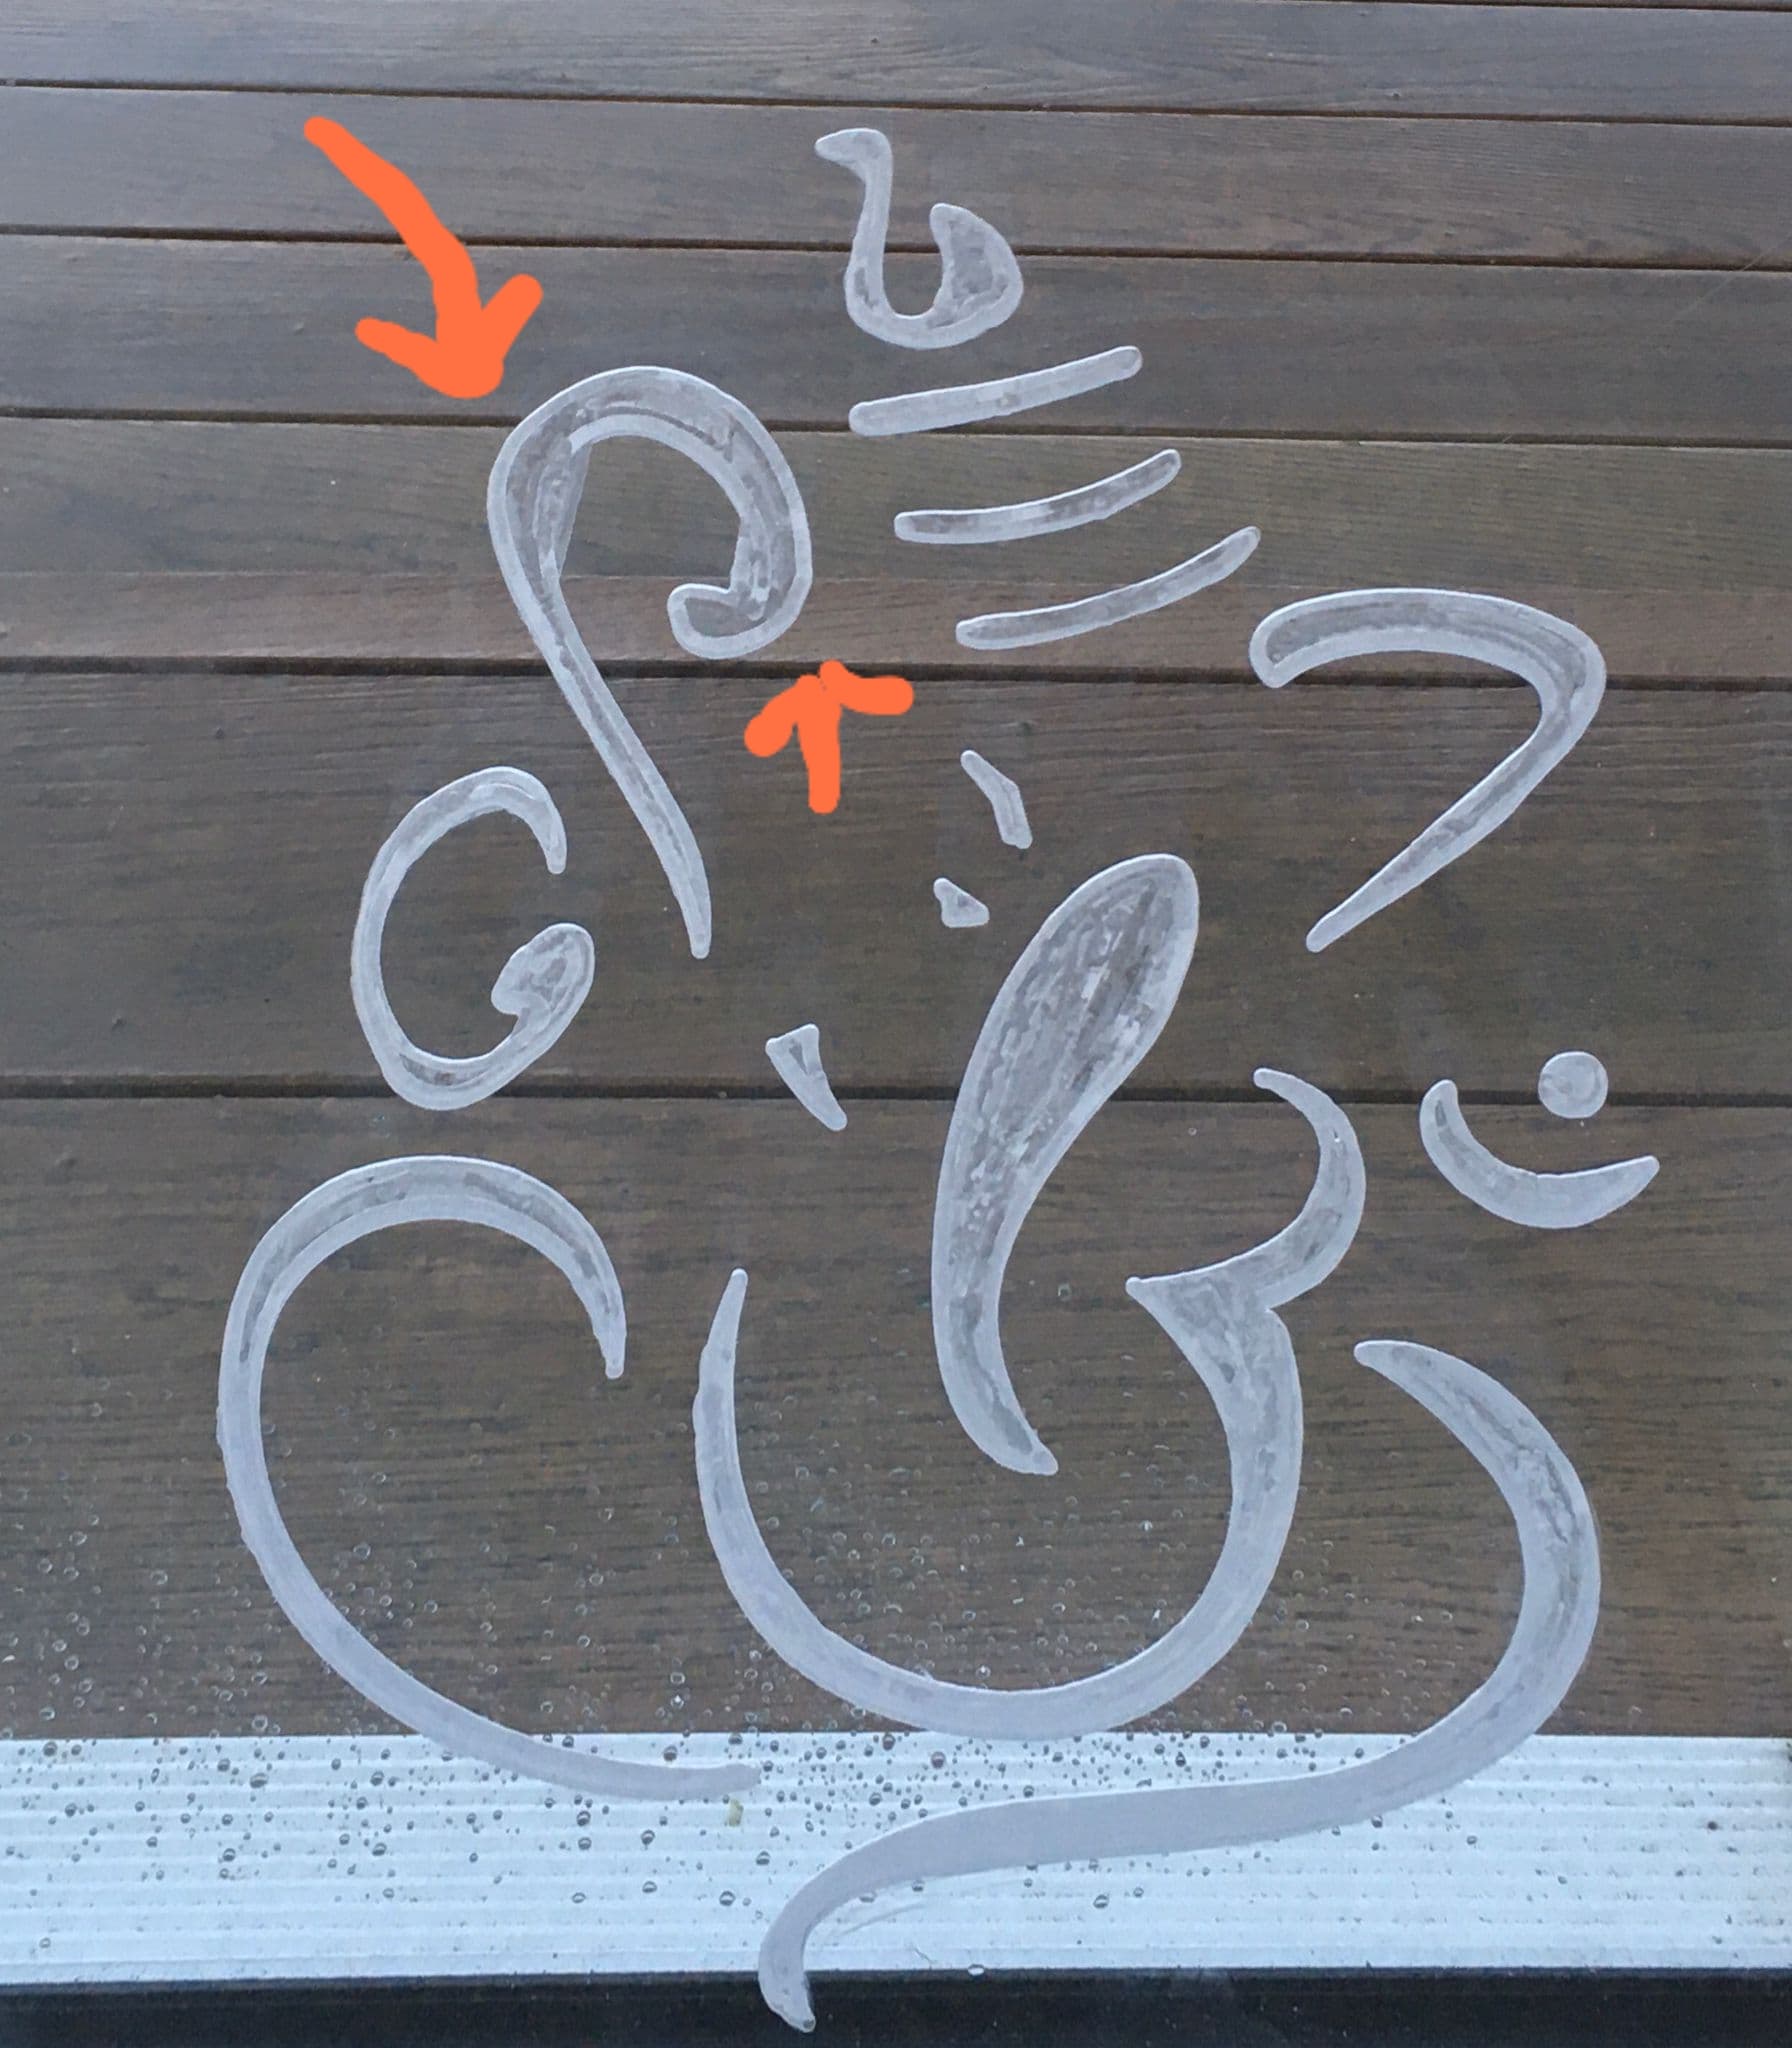
I had another issue I could not mirror image a compound object ( one with multiple tracks)-like in my hedgehog project where I had to mirror each object inndividually- a pain.
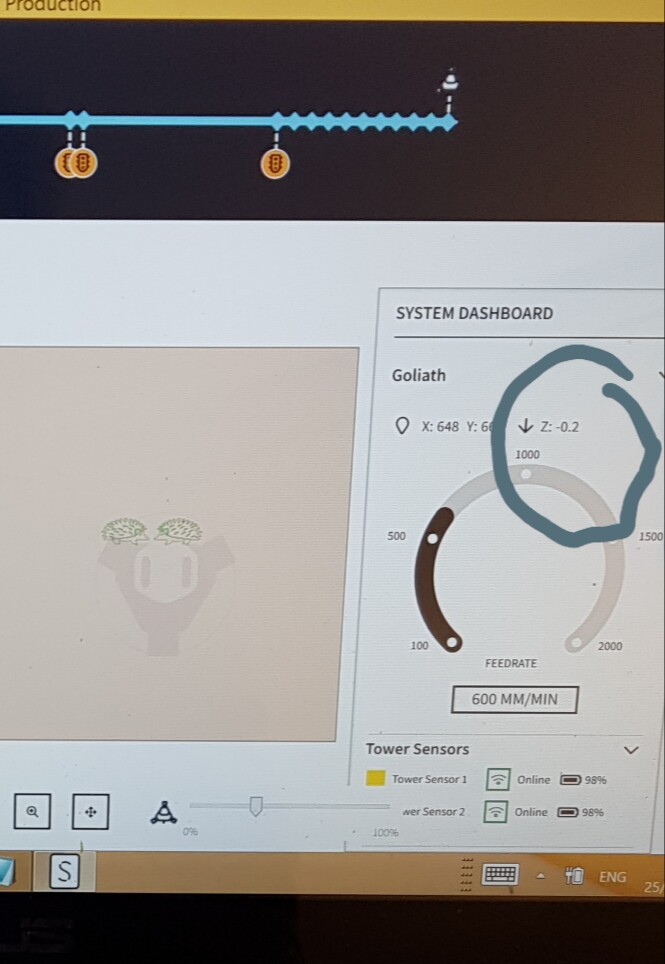
A few thought I would love for an update. I would really like snap points in Slingshot, even if it is just at the apex corner of tower 1, it would really allow for me to optimize cutting and do multi sheet projects. It would also be nice to see and know that cuts are outside of the reasonable cutting area before sending the code, or if extensions are needed. I feel like those are things that can be known before going through the trouble of setting up towers, only to find out you need extensions and have to reset your whole table.
Check my post on gallery ‘X marks the spot target control’
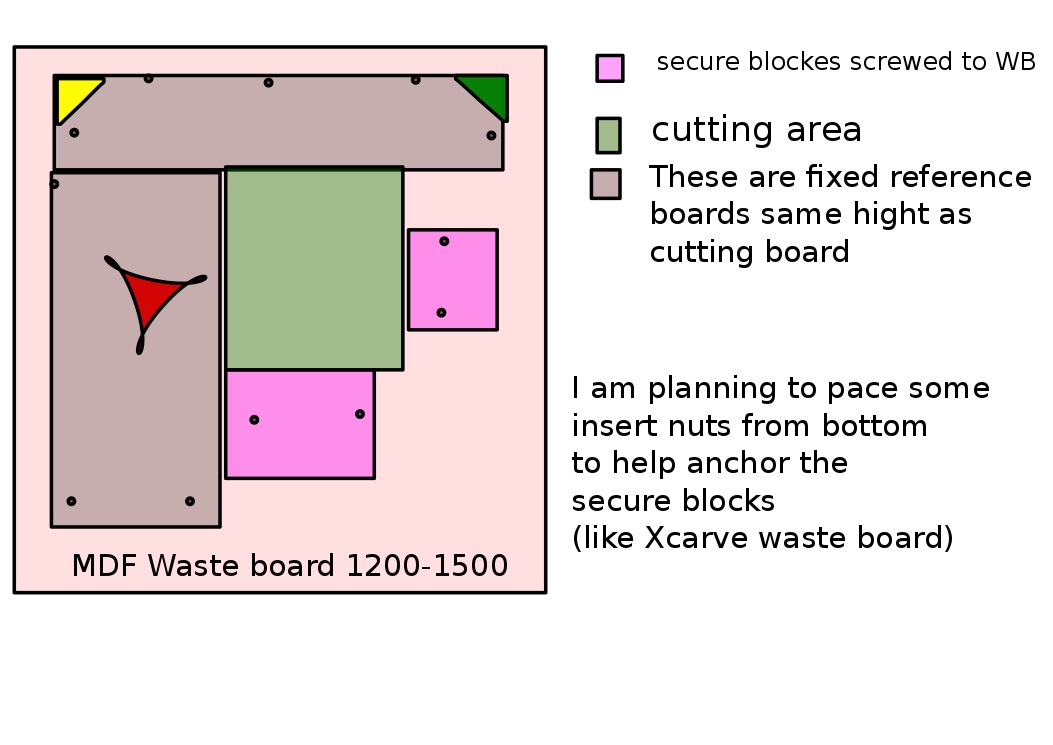
These days i cut small projects multiple time as gift items and I won’t change the tower sensors as they are fixed on the periphery and the cutting area is replaced each time and I do not change the dimensions (y axis sensors, x axis same distance as y).
My working piece is much smaller fixed with either pins or screws on a separate wood which wedges the piece. I cut many times and if for any reason goliath errors then I rerun the program and it cuts on the same path.( caution if you are using pocketing).
I will post one of these days my work area when I clean it.
This is exactly what I was going to try next. Good lookin setup. Its definitely a bit of a logic puzzle to build a work area that is easy to reuse and isn’t going to be expendable and have to be recreated. Good call putting the towers on the same piece of wood near the top.
I’m also working on a project to replace a sign for a pal’s cool Nintendo cabinet. I wish more than anything you could group tracks and put them in folders haha. I need to be very precise to cut these things to fit into the hole they’re going in and to look good and that’s impossible if every layer is its own nightmare puzzle piece.
The setup is a schematic design.
You can change the horizontal and vertical reference pieces depending on your cutting area.
The idea is keep the inter tower dustance as constant as possible so you can enter the same value during setup.
The cutting area will be more than the maximum cut of the artwork. This way you don’t wast large pices of expensive materials. After a test run at very low depth of cut on a waste piece you can repeat on the correct piece. The repeat cut accuracy is pretty good.
A compound image with lot of layears can be separated as each layer on different canvas- I guess.
When cutting pocket still has few unexpected results-
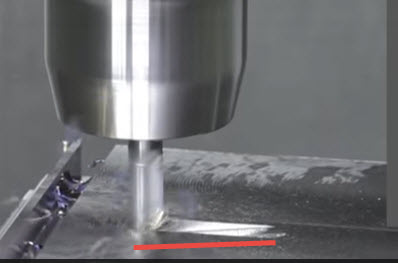
Cut with 3mm 2flute on crystal acrylic and spray from reverse- on the top left was unexpected straight cut. Had to dremel with sanding bit.
Before spray on clear acrylic
PREVIEW in slingshot the gcode path!!! this way you can see if it will run over a previous project that left a big hole!
MOST IMPORTANT ONE !!! be able to mark on the canvas where previous cuts ( ie HOLES ) are so that the GCODE generation will make sure the robot will not roll over empty spots! if no good calculation FINE! thenprompt that you need new work area OR expanded panel ! ; this is where 1) allows you to save work board space!
Once you hit the start button you should be able to stop Goliath from computer which sent the gcode to it! this way you can recover !
Also do RAMP plunge for ALL cuts!!! this allows the robot to not have to dig in right away but move toward depth cut… is standard in most CNC CAM prograams.
I would say you have an AMAZING piece of hardware!!! Your software is where the magic happens to turn it into a real product!
So say you have a 3mm depth of cut. Instead of the cutter cutting down to 3mm and then moving along its path… its calculates a way to move along the path and slowly reaching or RAMPING to the plunge depth. its less wear on your tool and generally a good thing… even cutting a hole assuming it it bigger than the bit benefits from ramping in.
It might well indeed and i failed to notice! i didnt observe that in one of my test cuts seems like it just dove down in… BUT it could be it only does it for certain length runs… if so very cool.
i know ive seen Z dip up and down while moving when it was doing tabs.