Ok, finally got around to unboxing and setting up.
1/ Panel detection, setting up to existing 2.4G network fails all the time, it says reboot goliath, but it sometimes connected to the network, and if it did (green light), I can see it in my list of attached network items, but the software does not find it, gave up using this method
2/ Panel detection, connect direct to goliath access point, the software seems to take over connecting to goliath, even if I try and disconnect. Bad behaviour without any notification. Software does crash if you do disconnected the wifi at times.
3/ Panel detection, I already have the project dimensions, why do I have to enter the info every single time.
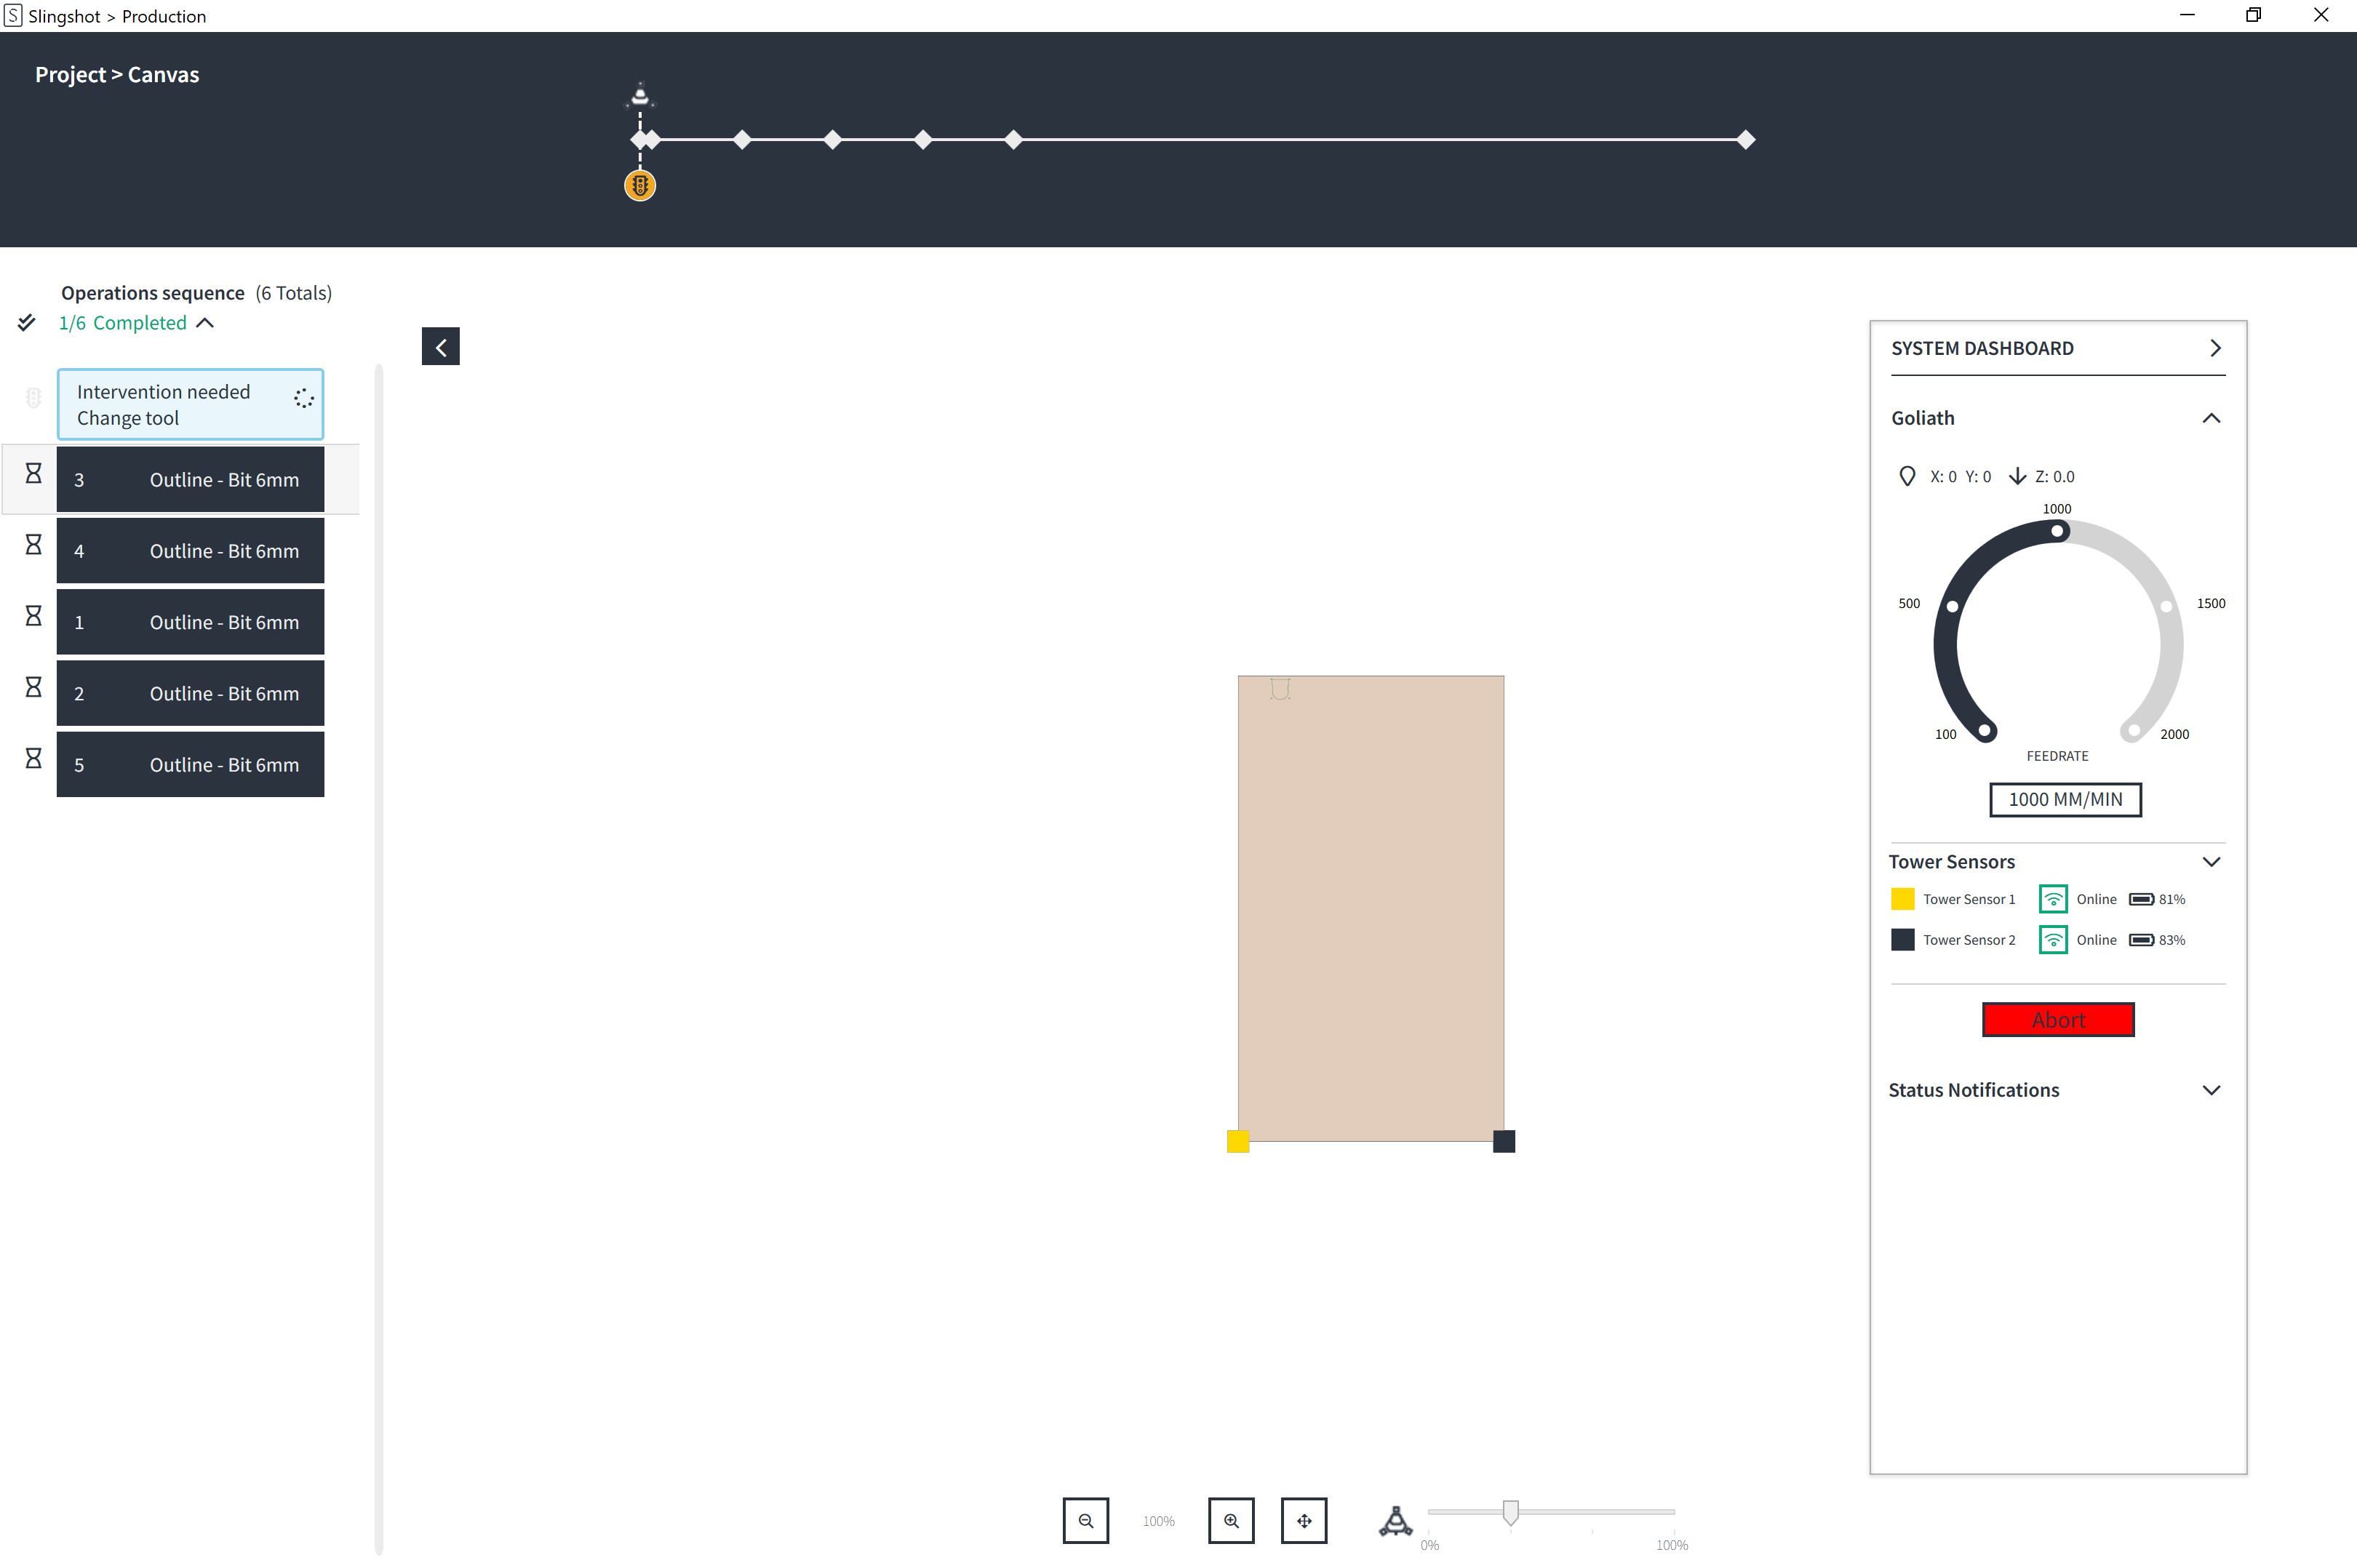
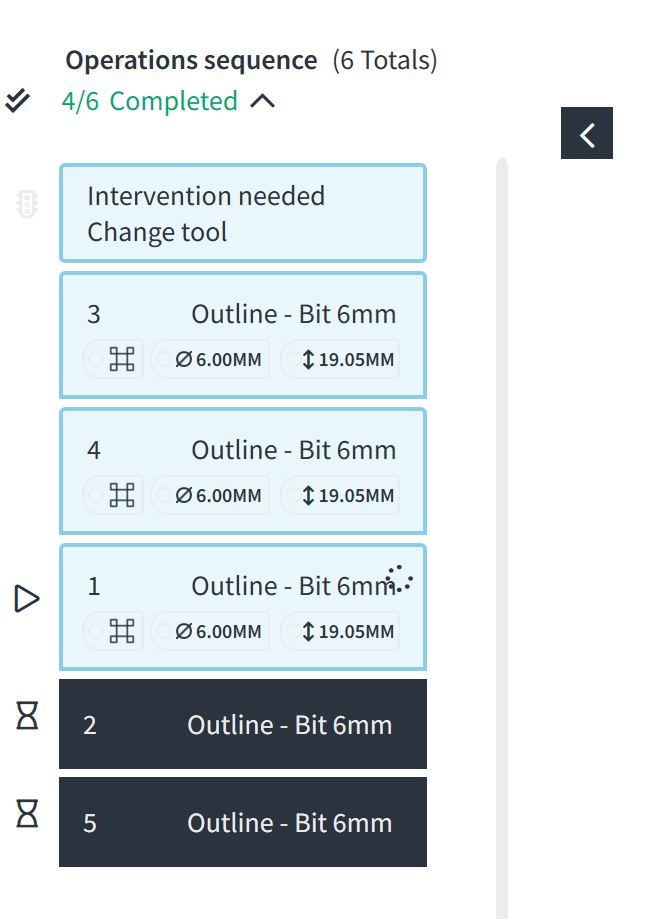
4/ made it to the z-axis calibration, it said done successfully. But now what. I have a screen that has “intervention needed, change tool”, but what do I do, there is no tool change required, no buttons to press, even pressing ABORT does nothing, cannot close this screen.
Point 4: Tapping the yellow button on top of Goliath should tell Goliath to start the next step.
Tapping the yellow has been done many times, it worked for the z axis calibration, but then it is stuck at the “intervention needed change tool”
And there is no way to get out of that screen that I posted. If I close the app with the “X”, then trying to restart the app gives and error, job in progress and the software crashes, you need to power off the unit, then start the software.
Did you give Goliath a firmware update to version 1.2.3 ?
Which version of Slingshot are you using? The latest 1.9.3?
Yes, all upgraded firmware and latest version of software installed yesterday.
1 Like
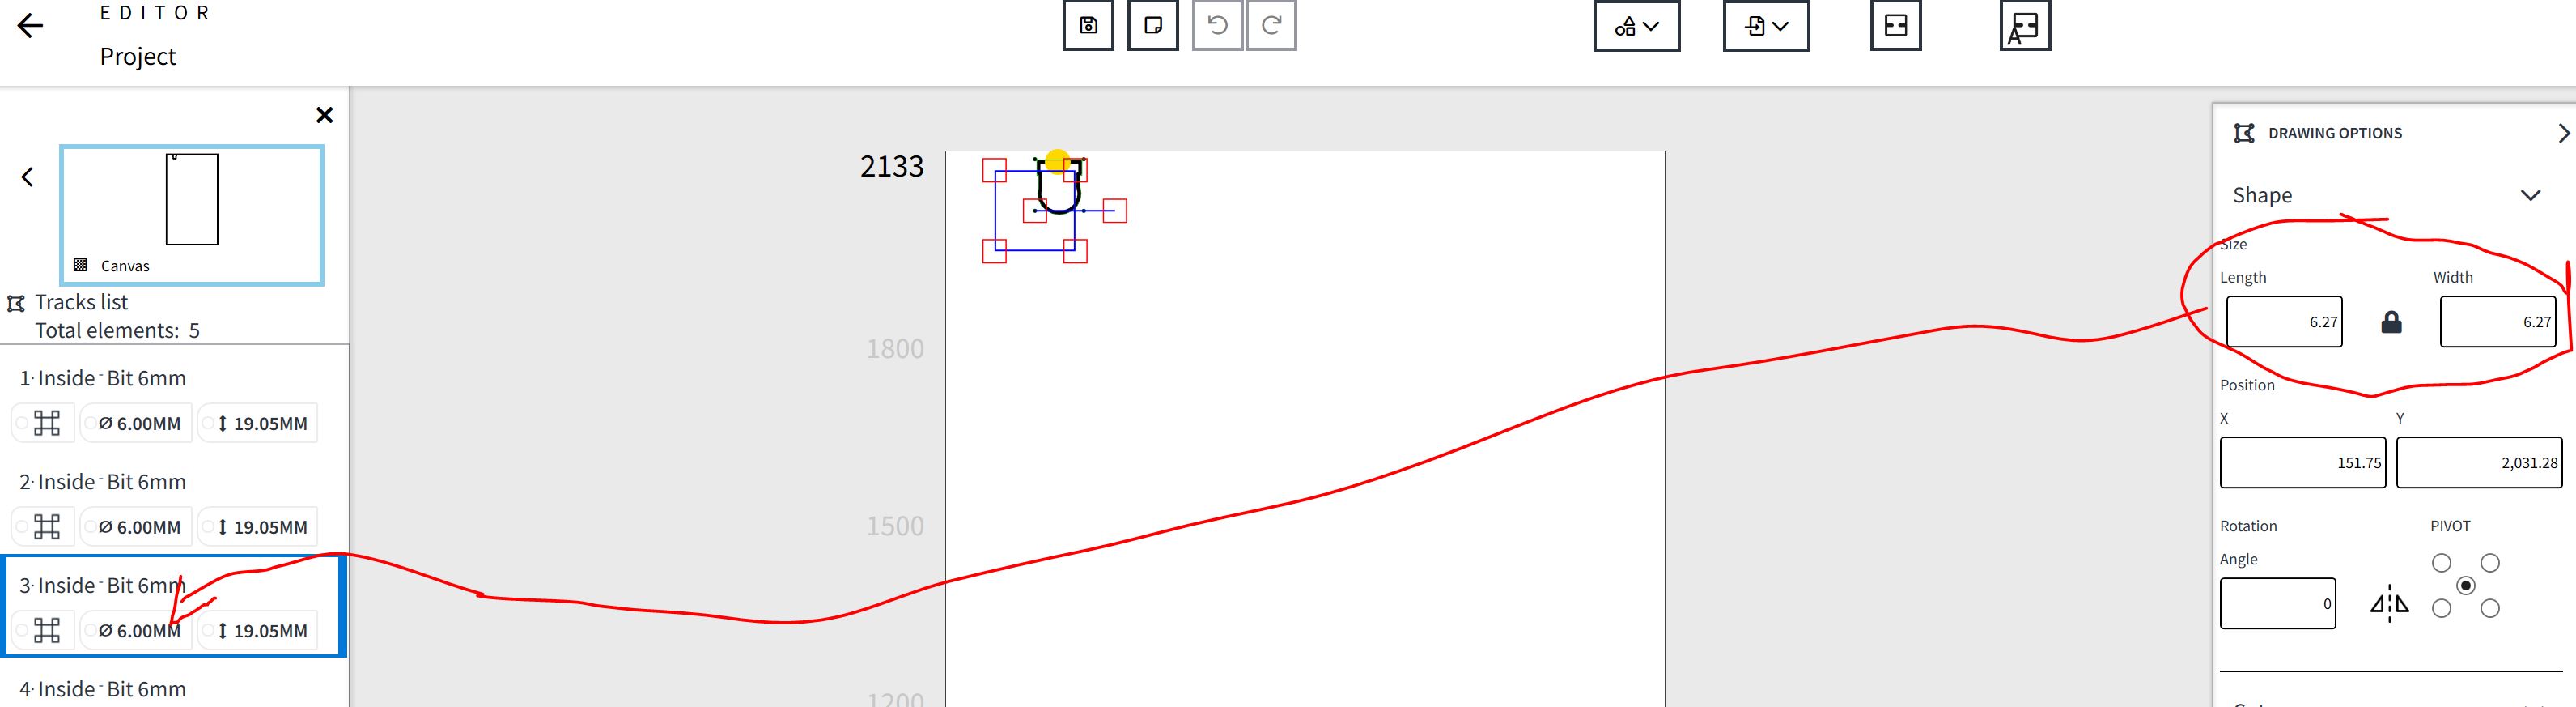
Looking at your “tracks” (profiles), you didn’t set any depth to cut… your project drawing seams empty?
Can you make a screenshot of the things you’re trying to cut?
I think it might the the 4 holes on each corner (the cut is a 4" section, so it looks small on the 7’ layout area)
The holes are larger than the bit, but it might think a different bit is required? Changing to a slightly larger hole to see if that is it.
Holes should only be slightly bigger then the bit (0.05 or even 0.01 mm).
What are your cutting parameters and feed rate?
I picked “recommended” for plywood, feed rate 1000, plunge 300, depth per pass 3.
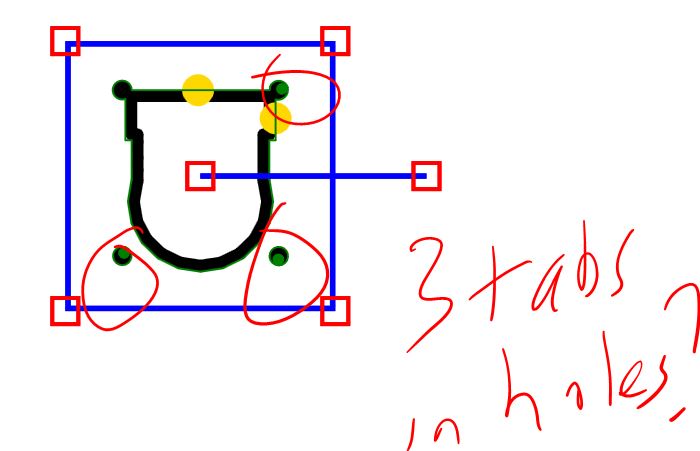
Ok, new layout with slightly larger holes, I am going to use larger bolts anyway. Now I cannot get it to go past “tabs needed”.
Previously I had no issue with a manually placed tab…
But now, If I use “autotab”, it sticks tabs in the small holes! And still does not clear the error that tabs are required?
The Z-value of your tabs should be about 2 or 3 mm not 18.95!
Its better to place the tabs by hand, a bigger part is better of with two tabs.
First, click on your tracks/path and click on it with your right mouse button, then choose “clear tabs”. Next place the tabs manually.
Your main part is quite “special”… I’m not sure that the milling bit can enter those two “ears” (holes) at the top (left and right).
PS: If the warnings remain after placing the tabs, you should close and reopen your project file.
It would be nice to know what the tab values actually mean, the U and L values? I want very minimal tabs, so a Z of 18.95 means only .1 of wood left at the bottom?
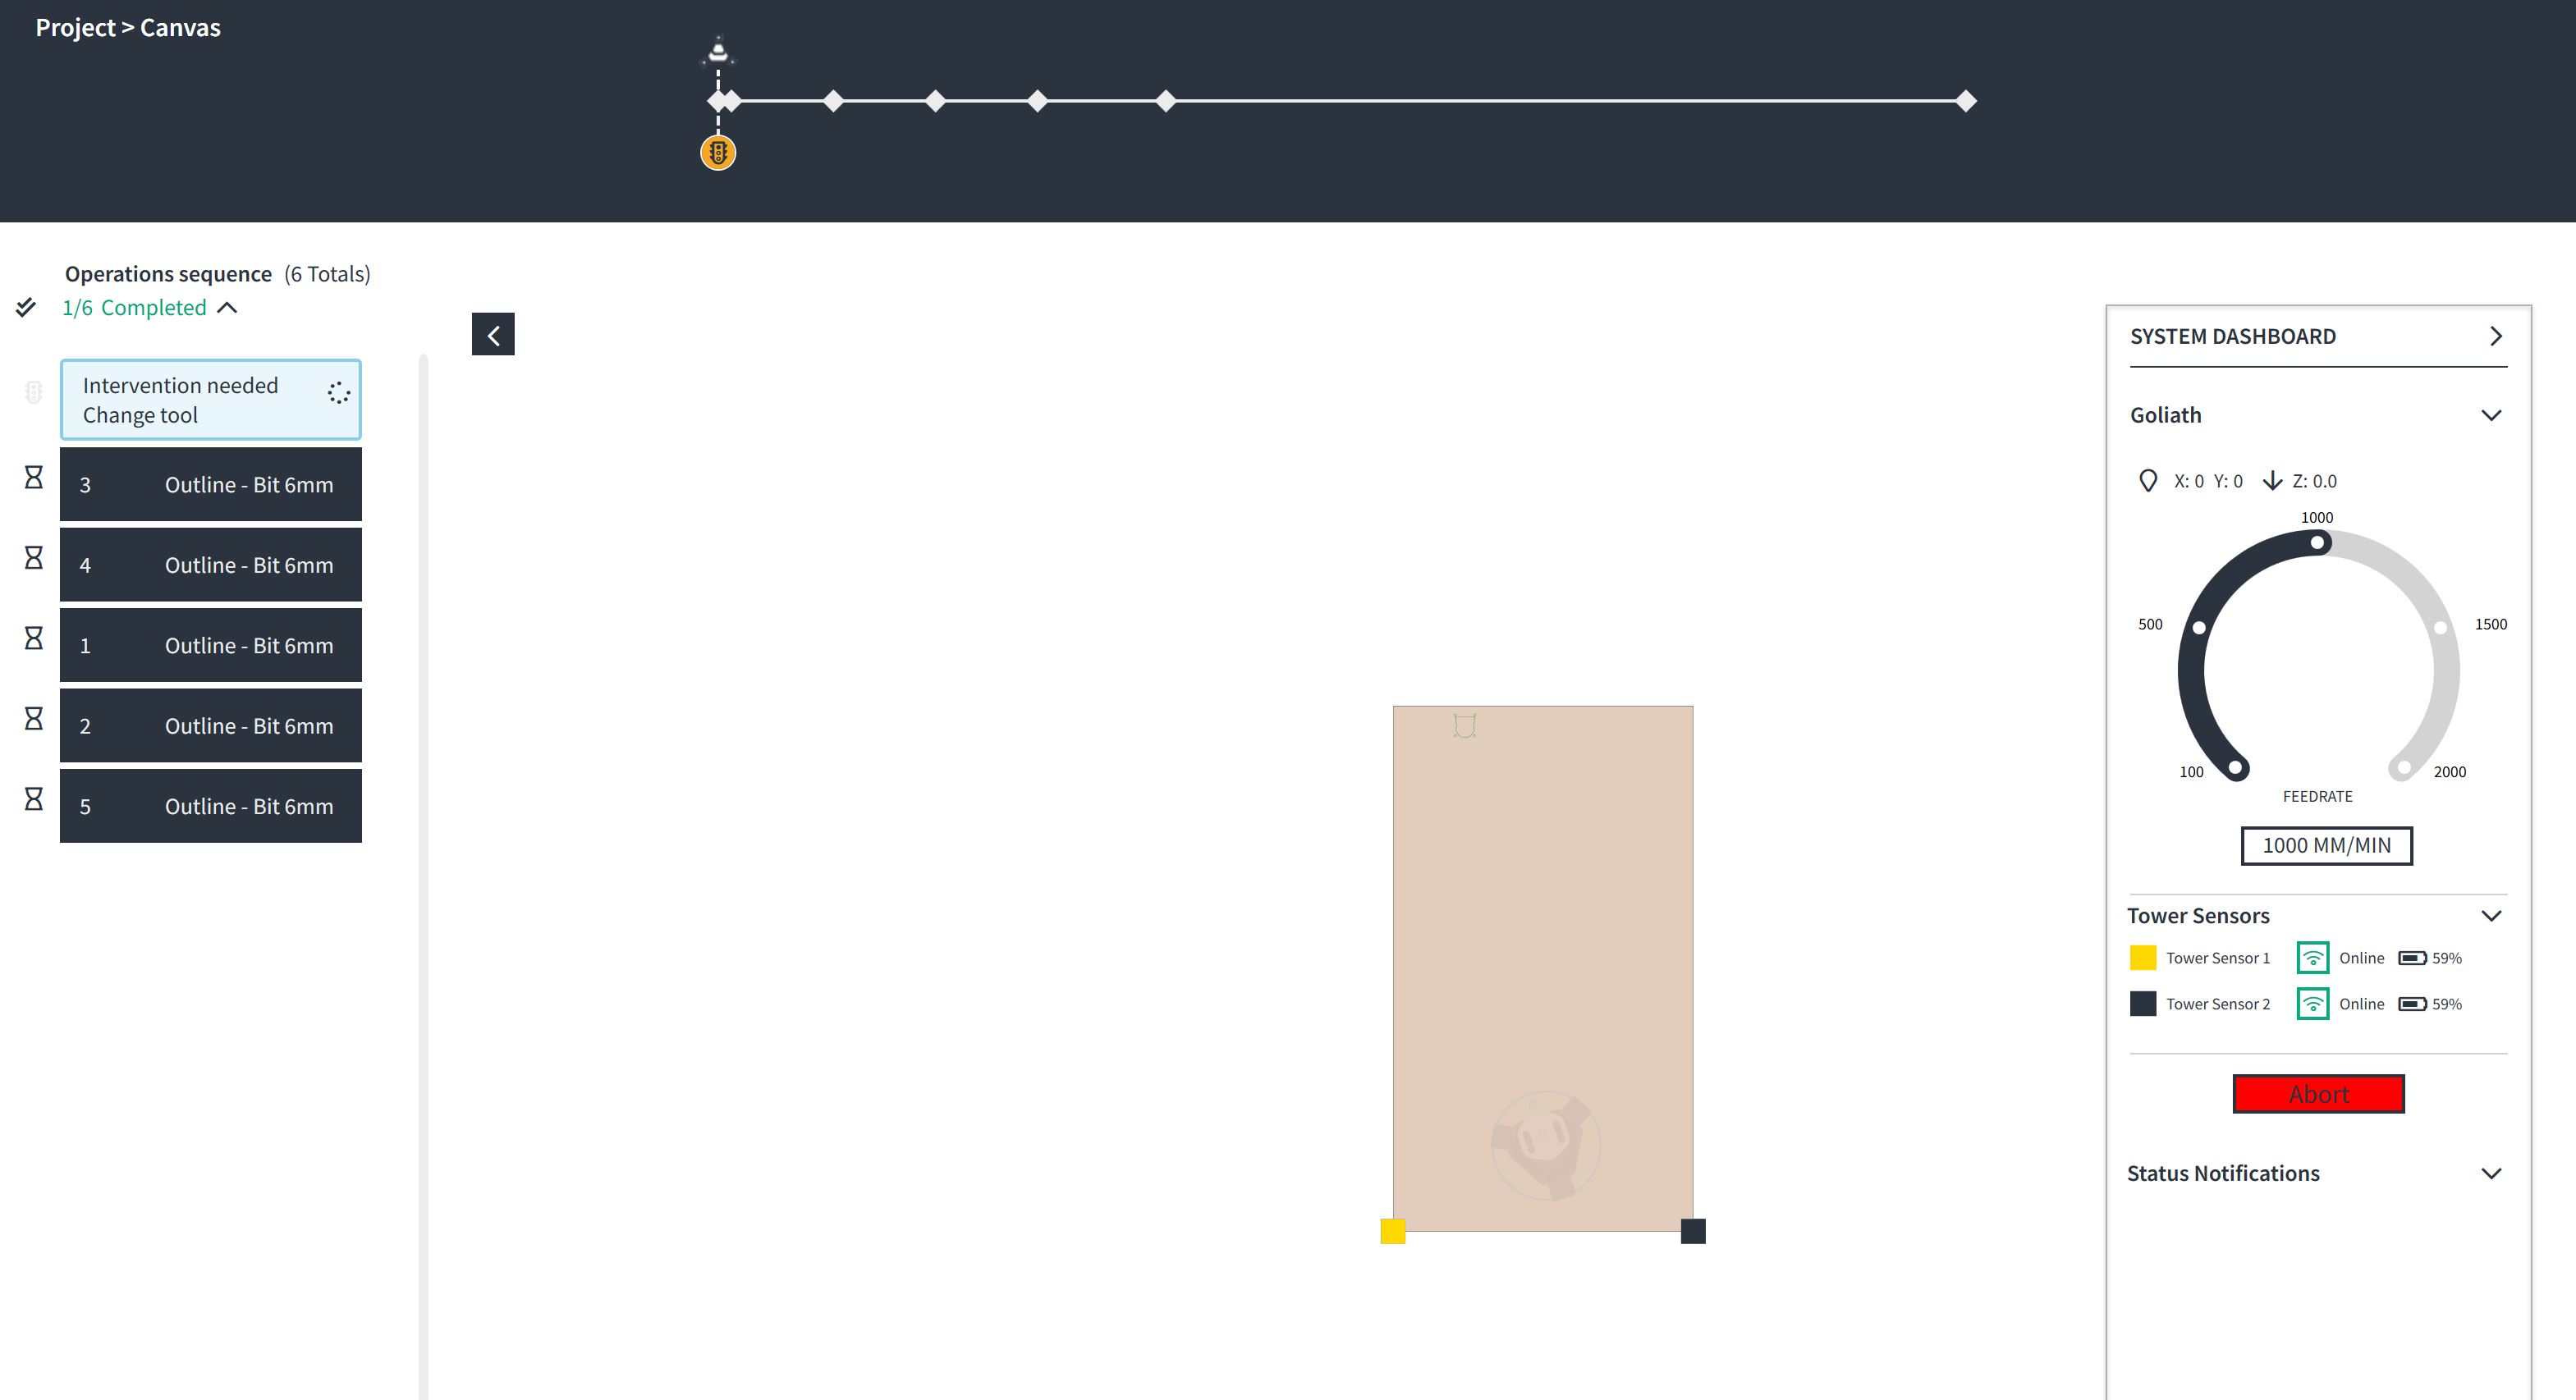
At this point I redid the drawing to make the 4 holes independent, and now I am back to my original issue with “change tool”, and this screen you are locked on there is no escape from this.
This is what Springa says about tool changes: How to install the bit and set the router cutting parameters - YouTube
(After installation of the bit, pushing the yellow button should proceed the cutting process).
The tab dimensions are as indicated in the drawing (icon) of Slingshot… the Z-value is measured from the underside of the sheet you’re cutting, L is the length at the underside of the sheet and U the length of the top of the tab.
By playing with the L and U value you can give the tab a diving and raising angle (“plunge angle”).
I have watched that video, the bit is installed. The z axis calibrated with no issue, but still stuck with the “change tool”, pressing the button does not do anything, and the UI does not allow for abort to do anything, you can only kill the program and restart again, which I have done 6 times with the same behaviour. I am going to play with tab setting this morning and see if that makes a difference.
Ok, so in that stuck state, if I removed the spindle cover ( which requires the machines to be lifted up, since after the zaxis calibration it is sitting at the bottom), and I took the bit out and put it back in, replaced the spindle cover, cleared the warning about spindle cover out of place. I then pressed the yellow button and off it went to do the cut (sadly with the wrong z calibration since there is no option to redo the calibration). Pressing the yellow button before removing the cover, did nothing. The workflow needs a lot of thinking and work when on this “execute” screen, there should be options to pause, calibrate, switch to jog mode etc.
Oh, yeah, and the mess to change tool did not clear…
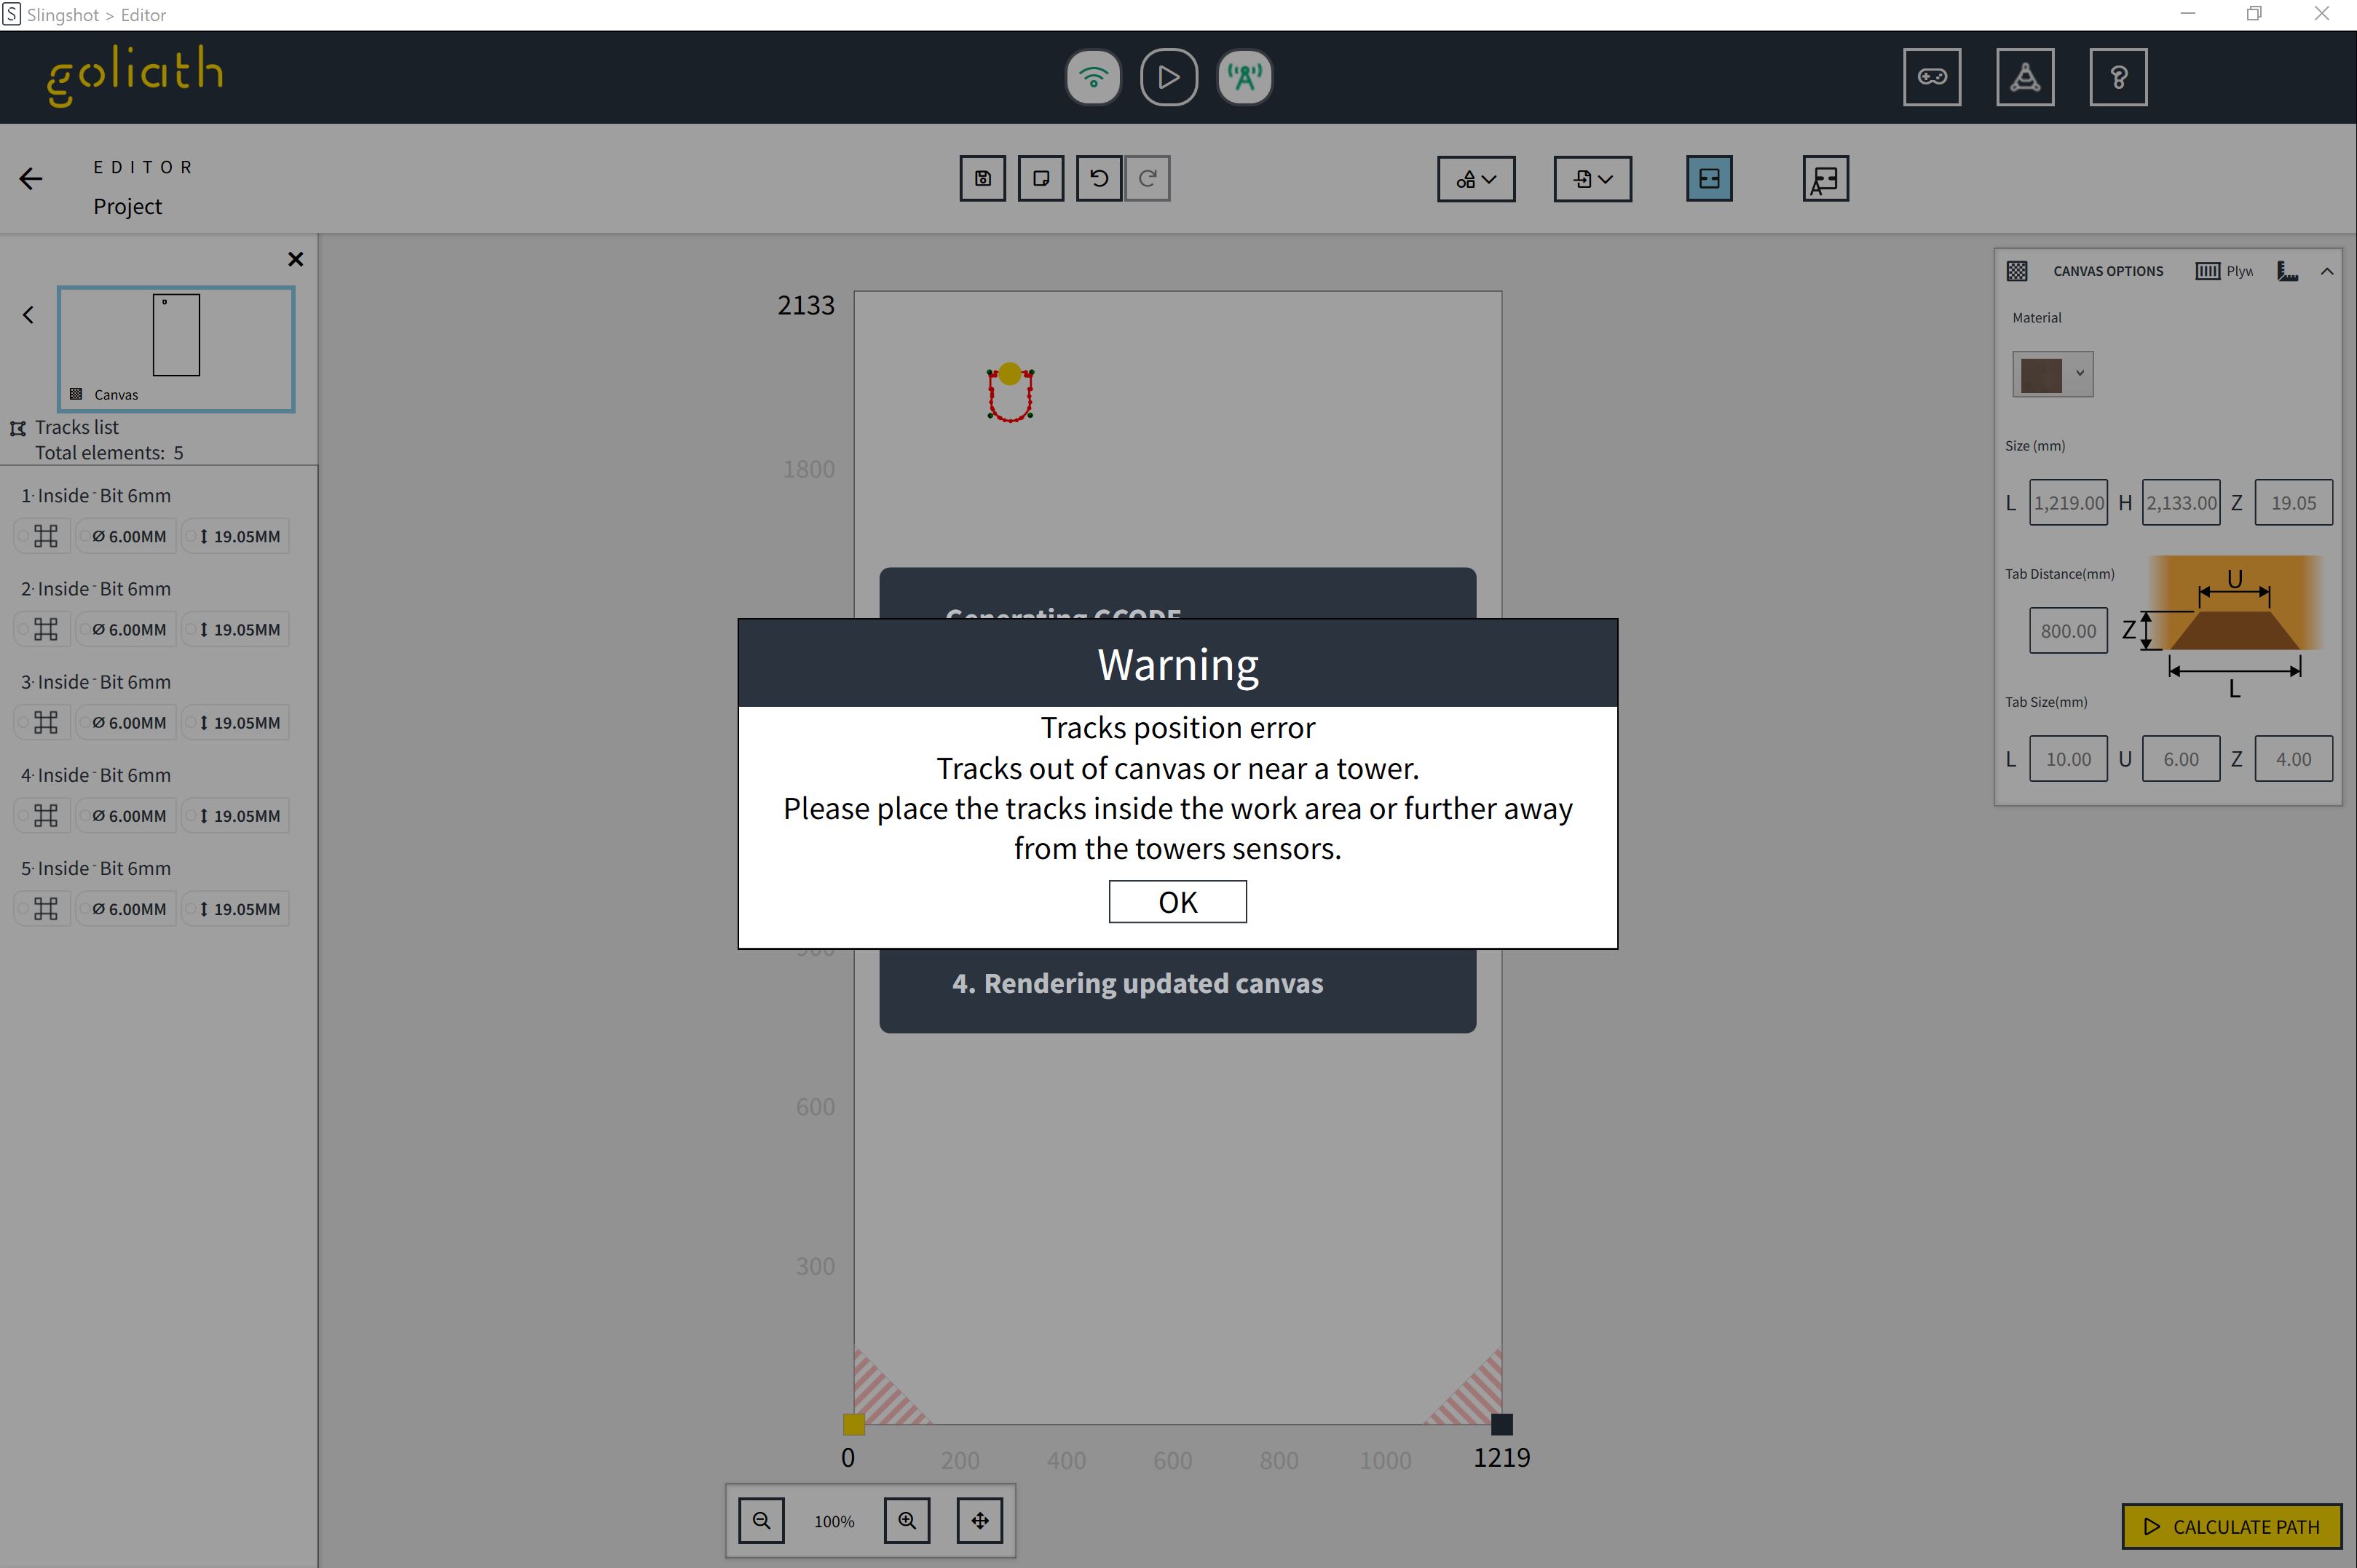
And now, trying to run it again, this time cannot create the gcode, it thinks it is not on the canvas now. I have saved, restarted, reimported, replaced the svg, all with the same results.
Nice to know you got Goliath cutting some tracks 
It seems that the user manual needs some updating 
The track position error has no direct solution to my knowledge… in my case it sometimes disappeared by closing and reopening the project or by shutting down Goliath and redo the panel detection.
You can check if every individual track is still on your canvas…
I sent it all into support, see what they say. The little item is definitely on the canvas, I tried in all different places, plus exporting the project and importing differently, spinning it, and all sorts of gyrations
Hopefully they get back within a week, need to cut a number of these in this larger sheet (the upper area is a scratch work space to test before tossing $100 sheet of wood)